So, I've been having these fabric paints since more than a year now, but never gave them a try. Until now, when I had to paint some T-shirts for a friends' pre-wedding party. Before getting to the actual work, I thought I'd try first on one of my plain t-shirts. And I got this:
I must admit, I gost this idea from my artist fellows on FB. I was amazed myself. Cross stitch looks so good in paint you can't even tell the difference from far away. In the same time, the result is much neater, easier to take care of and way much easier to obtain :D (although I spent a couple of hours for this particular design - a folkloric motif from my natal region, Dobrogea).
The photos were taken in the Natural Parc of Comana in Romania, a protected area and the second one as biodiversity after the Danube Delta.
Showing posts with label clothes. Show all posts
Sunday, July 19, 2015
Thursday, October 2, 2014
Gray bolero
I made this vest initially for me. Not that it didn't suit me well, but I chose to give it to a special person on her birthday. I even added the pom-poms on that very day! The vest is featured in the summer collection of Simply Crochet magazine which I downloaded for free from here: http://www.molliemakesusa.com/wp-content/uploads/2014/04/simply_crochet_digital_download.pdf. I struggled a little with the pattern, but as you all know, different kinds of yarn act so differently worked with the very same crochet hook... For my vest, I used doubled Alize Bella cotton yarn, a 5 mm crochet hook and minimized the number of patterned columns, as even the smallest number was too large for me...
Anyway, maybe someday I'll make another one for me too. Maybe in white this time - I realised white suites me best when it comes to vests :)
Friday, June 27, 2014
Summer hat and peasant dress
I know I post way less often than I should, although I don't lack beautiful projects I happen to finish from time to time. But that's only because sometimes I feel guilty doing them, because I feel like I'm supposed to do something else (like, for instance, really work on my PhD research), and that brings some shame in showing what I really am into sometimes. That's why, I feel like I need to change something about this, and I think that really living for myself would be a good start. I mean, doing creative things would be better than trying to work hard on something that annoys me and not really accomplish anything. Or, thinking small, like finishing this or that project today would make me very happy tomorrow, and not only in a few years, after I get my PhD degree.
The second project is a peasant dress that I started long ago, but only finshed it after I got my new sewing machine (which, by the way, is divine!). I wanted first to hand embroider it, but for lack of time and desire, I bought instead lacy borders and sew them on it. I also added small crochet bubbles for visual effect. The pictures were taken on the way to my parents home, near a poppy field. We also got puppies for the photos!
Seeing the poppies, I remembered about a little creative moment from my childhood. Did you ever make a doll like the one in the picture bellow from poppy flowers?
Wednesday, June 18, 2014
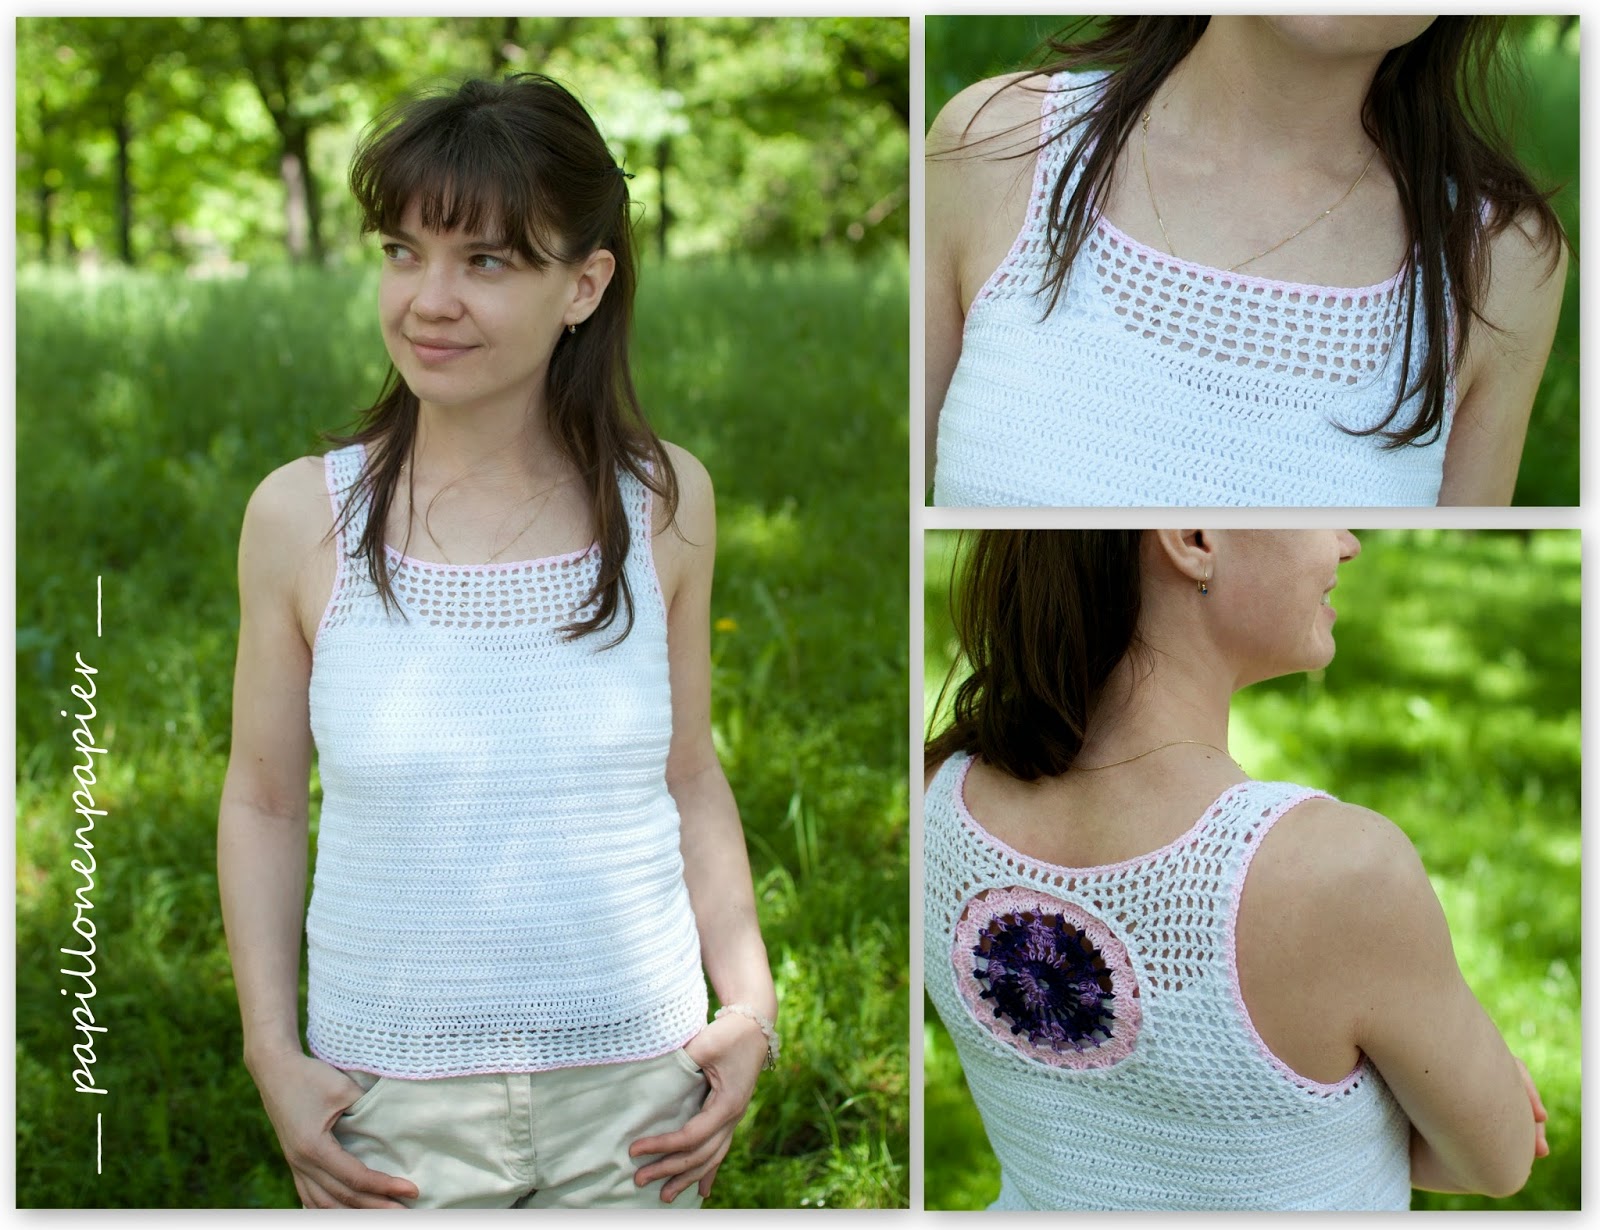
Simply Crochet featured blouses
Not much to tell about these two new creation, but that I soooo like the gradient blouse!
Materials used for the gradient blouse:
- YarnArt gradient cotton
- 3 mm crochet hook
- pattern from issue no 9 of Simply Crochet magazine
Materials for the mandala shirt:
- Alize Diva silk effect yarn
- 3 mm crochet hook
- pattern from issue no 17 of Simply Crochet Magazine
I chose to make a colourful mandala and a fade pink border because I thought that the uni version looked too simple :D
Materials used for the gradient blouse:
- YarnArt gradient cotton
- 3 mm crochet hook
- pattern from issue no 9 of Simply Crochet magazine
Materials for the mandala shirt:
- Alize Diva silk effect yarn
- 3 mm crochet hook
- pattern from issue no 17 of Simply Crochet Magazine
I chose to make a colourful mandala and a fade pink border because I thought that the uni version looked too simple :D
Monday, February 3, 2014
Winter crochet
I originally bought the yarn for my mom, who has also discovered recently her love for crochet (only she doesn't like patterns, but free-lancing crochet). But when I put the colors together, I just couldn't help making something out of them. I don't really get along with acrylic very well, but its quite warm and it looks good, too. Anyway, I managed to finish three different winter(?) patterns using this color mix. Hope you like it too!
Links to the patterns:
Wednesday, January 8, 2014
Sketches for future crochet dresses
First of all, happy new year to you all!
I've been wanting a Moleskine notebook for a long time, so last Christmas (that is the Christmas of 2012) I finally got one from my boyfriend.
I didn't have any inspiration to start it, though, until yesterday. When I procastinated by drawing 2 sketches for 2 crochet dresses that I have in mind for this summer. They are both inspired from photos on web, related to crochet dresses. But, as it can be easily figured out from the names I gave them, I intend to use granny squares, extended to the desired length of the dress. I am still thinking about the type off collar I'm gonna use.
The drawings are quite rough, as I didn't put any special attention to details, and did them in very short amount of time.
Anyway, I decided this year I won't put any of my energy in making items for sell, as this will be my wedding year (the wedding will be sometime in spring of 2015). And, further more, this will be MY YEAR, I really hope I'll discover my style, my pleasures and also, I'll learn how to better manage my time.
Thanks for you visits!
Cristina
Tuesday, December 10, 2013
Crochet Granny Christmas Tree
This original idea seems to be a very old one already. Anyway, thanks to Laura from Sew Ritzy Tizy who spied this granny Christmas Tree in an old woman's house, I was also able to replicate such a sweet ornament. As the name has already given you a hint, it is realised from simple green granny squares with white borders. The baubles are simple sc or dc circles, and I also added a star (I used this free pattern) and a small string of sparkly yarn as a garland, to give it shine. I used a very small hook (1.1 mm) so my Christmas tree is only about 20 cm high.
PS: I just wanted to show you some goodies I just can't help adoring:
...and a little preview of the glittens I have made this weekend using this pattern - aren't they just lovely? :)
Sunday, November 24, 2013
Crochet snowflake blouse
Somebody asked me a while ago if I can do a blouse out of the snoflake hexagons. She wanted something with long sleeves. Fortunately enough for me, that girl wasn't too convinced about her choice, so I tried to give it a go for myself. After a few more sketches and observations, I concluded that long sleeves weren't such a good idea for this model. Also, for the front and back neckline I crocheted partial snowflakes, so I have a neat border. In the end, this neckline needed a few more sc decreasing rows, to tighten it a little bit. And that was all. I joined the hexagons the same way I did with the corresponding bag, that is single crochet along the edges.
Crochet baby hat FREE PATTERN
I made this hat inspired by Kinga from My hobby is crochet. She didn't write the pattern, so I came with my own version, that I share with with bellow. The instructions are in english. Hope you make great hats for babies in your lives! :)
PATTERN:
I used 3.5 mm crochet hook and Red Heart Baby yarn in two colors, but these can be chosen relative to the age of the baby and available yarn.
Begin with magic ring, A color,
Row 1: 20 dc in magic ring, fasten off;
Row 2 (change color to B): (2dc cluster st, ch1) in each dc, fasten off;
Row 3 (change color to A): (1dc, ch2, 1 dc) in each ch1 space;
Row 4: (2dc, ch2, 2dc, ch1) in next ch2 sp, skip 1 ch2 sp, continue working like this till the end of the row;
Row 5 (attach B color right after the end of row 4): working around row 4, (2dc, ch2, 2 dc, ch1) in each remaining ch2 sp on row 3; before ending this row, make sure to pull toward you the end of the A color yarn on row 4, so you can continue working with it;
Row 6: continue with A color, working around row 5 and making sure to pull toward you the end of B color yarn, (3dc, ch2, 3dc,ch2) in each ch2 sp on row 4;
Row 7: with B, working around row 6, (3dc, ch2, 3dc,ch2) in each ch2 sp on row 5.
Rows 8 to 19: work similar to rows 6 and 7; At the end of row 18, fasten off;
Row 20: working around row 19, 9dc in each ch2 sp on row 18, 1sc in each ch2 sp on row 19. Fasten off.
If 9dc in each ch2 sp on row 20 seems to be too much, you can reduce number to 8dc.
2dc cluster stich instructions
ATTENTION!
This is not a verified pattern. I only wrote the instructions after I made the hat, so they might not be totally correct. Also, I don't have any kids yet, so I don't know how this looks on a baby. If any of you makes this hat, please share with us your work and observations! Many thanks!
Lumi & Kinga
Saturday, November 23, 2013
Russian crochet dress
I managed finally to do a proper presentation in images of my beloved dress I made and wore this summer in Bulgaria. Even that evening when the photos were taken, a young curly haired russian girl (she should have guessed something!) congratulated me for the beauty of the dress. I was really impressed!
The model itself is actually designed by a russian, but I can't find her blog anymore, so I made a collage of the photos that inspired me to do this (they still have watermark, so if you find the original link, please post it back here). Hope it helps. As for me, I wouldn't replicate it the second time. It was really a hard work and had to unpick it many times until it was right for me. Enjoy!
Diagram and photos that inspired me:
Wednesday, November 13, 2013
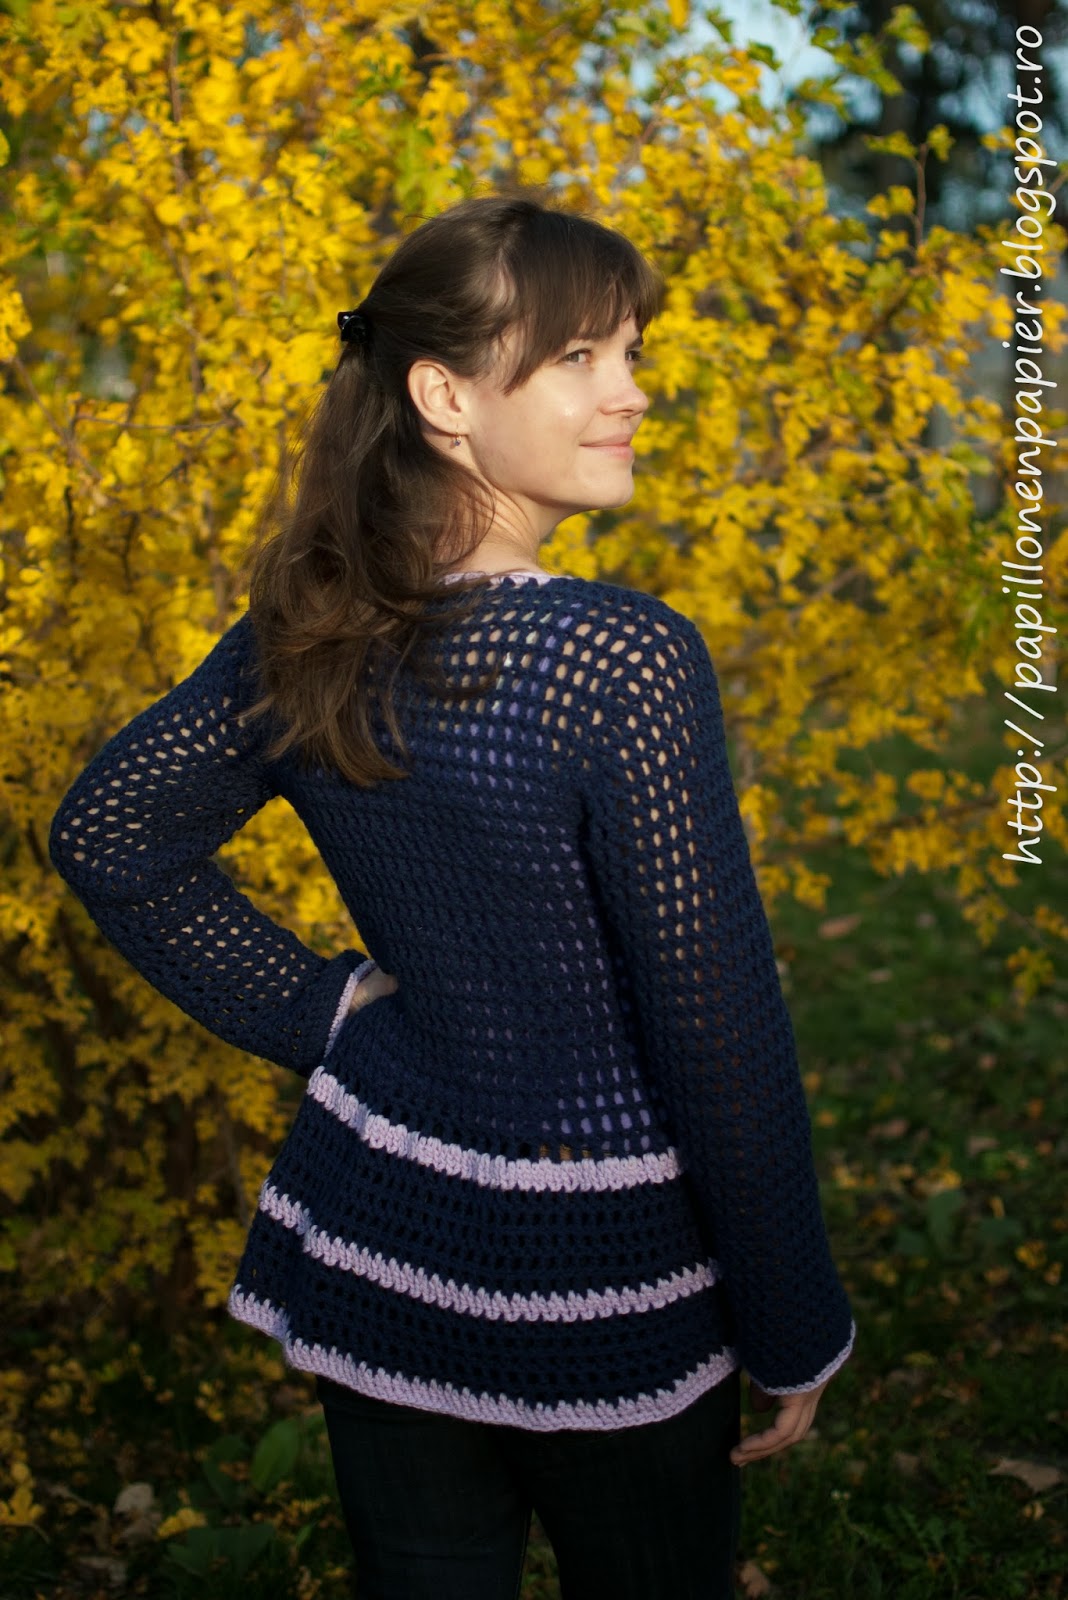
Any day crochet cardigan and ruffle scarf
This cardigan is based on Double Stich Twins Any Day Cardigan pattern. I say "is based" because I couldn't follow the pattern as it was, the design didn't suit me very well, so I just kept the model and created my own version, with buttons and extra coloured stripes.
The pattern for the scarf is this one (I also added an extra row because it seemed too thin to me).
I think the two pices work very well together.
Used Red Heart Baby in double thread and 6 mm crochet hook.
The pattern for the scarf is this one (I also added an extra row because it seemed too thin to me).
I think the two pices work very well together.
Used Red Heart Baby in double thread and 6 mm crochet hook.
Tuesday, November 12, 2013
Tatting lace for shirt embelishment
Been having this on mind since a long time. I bought this shirt from Takko fashion and the idea of embelishing the front with some kind of ribbon seemed wonderful, although the ribbon itself with its long beads looked horrible. So I thought about making this lace ribbon in tatting technique. I just had to chose from the multiple models proposed by Daniela on her FB page. Actually, she's the one that taught me needle tatting through her video tutorials. Although I tried using a shuttle, I think I'll stick with needle technique. It requires more attention and I find it more precise.
For the model bellow, I used this tutorial and a transparent bead for each long side.
Thursday, November 7, 2013
Crochet photo session
Remember the crochet poncho made of flowery squares? I promised we'd make a photo session wearing that special poncho, so here it is, fresh and hot. My purse also won a special photo shooting so, if you remember my old post about ongoing projects, you'll surely recognise what that snowflake hexagons turned into. Because I used acrylic yarn, it became a little fluffly after a summer of everyday wearing and a couple of machine washings, but it's still holding a good and photogenic shape, don't you think?
Bernat Lace Cardigan remake
I was looking for a long time this kind of cardigan to have in my wardrobe and to match with my dresses, but in the end I came to the conclusion that the best you could have of this is the one you make yourself.
I have been wearing this cardigan all summer long, and I'm very pleased with the way it looks, even if I couldn't follow the instruction by sizes, but I combined patterns for different sizes to come to a decent version of it.
Link to the pattern PS: Do you like my crochet apples? :D
Saturday, November 2, 2013
Lila Vanilla crochet baby set
This is my first attempt to crochet something for a baby. But it's for a good cause: tomorrow, my very new little neighbour girl will get baptized, so I crocheted during the week this set. I hope she, and especially her parents, will be delighted by what I managed to do. At least I know I am! Anyway, as I heard from my boyfriend, who is going to put on video the whole christening event, our neighbours are very fine people, so I really hope this will also be an opportunity to get in touch more often with them.
I got inspired from various sources:
1. Beanie
2. Dress
3. Booties
The choice of color was personal.
UPDATE FOR THE BEANIE: With the approval of Kinga from Myhobbyiscrochet,I wrote a free pattern for the beanie, which you can find here.
Thank you for your visit! :)
I got inspired from various sources:
1. Beanie
2. Dress
3. Booties
The choice of color was personal.
UPDATE FOR THE BEANIE: With the approval of Kinga from Myhobbyiscrochet,I wrote a free pattern for the beanie, which you can find here.
Thank you for your visit! :)
Tuesday, June 11, 2013
Flower power shirt
Probably the cutest crochet project I have ever made [by now]. I just decorated a basic cotton shirt with tiny crochet flowers.
Thursday, May 30, 2013
Crochet poncho made of flowery granny squares
This is it! It's finished! After many hours and days of crocheting and crocheting again and again [in all kinds of positions], I managed to finish my first big crochet project. I inspired from a blanket tutorial that I found in the book I bought a few months ago (Link to the english version of the book). At first I thought I would go for the blanket too. But I irreversibly fell in love with this flowery pattern, that I wanted to wear it, and be proud of it, indeed! And I made a lot of mistakes doing it: a few extra stitches here, a few less stitches there... Anyway, I think nobody could notice them, instead of me (unless you are a crochet geek too).
Next, soon, I hope, I intend to do a photo session wearing this wonderful poncho, for this blog. You will see then how this would fit on somebody of my size. Till then, here is a preview of what my 2 mm crochet hook created (with my help, of course):
And yes, it's all in pink and white, I know!
PS: I'm not selling this item, and I don't really think I will ever reproduce it. But I was just curious about how much this worths for me, in terms of money, so I made this little calculation:
- I weighed the final result to figure out about how much yarn I used, and it turned out that this poncho ate more than 8 clews of 50 g of yarn x 8 RON each =70 RON;
- 36.5 squares + butterfly x 1.5h (at least) spent on each item = 56.25h (that would be approximately 7 days for a normal 8h work program);
- 60 sides to match together x 12 min for each = 12 hours;
- edging = approximately 4 hours; that makes a total of approximately 73 hours.
At my workplace, dividing my salary in number of hours I work in a month, I usually get paid a sum of approximately 13.5 RON/hour. For this project, this means 73 x 13.5 = 985.5 RON. Adding this sum to that of raw materials = 1055.5 RON = 245 EUR :D wow... even me, I was thinking of a more reasonable sum...
Link to the book that contains the square pattern (with purchase)